If you got this alert in Google AdSense Account “Earnings at risk – You need to fix some ads.txt file issues to avoid severe impact to your revenue.” then you need to add the ads text file to your WordPress Website.
Why do you need to use ads.txt file?
Google AdSense recommends that. Because it helps ensure that your digital ad inventory is only sold through sellers (such as AdSense) who you’ve identified as authorized. In addition, It can help buyers identify counterfeit inventory. Besides, it helps you receive more advertiser spend that might have otherwise gone toward that counterfeit inventory.
How To Create ads File.
In WordPress, It is so easy to do, you can create, manage, and validate your Ads.txt from within WordPress via the Ads.txt Manager plugin.
Step 1: Sign in to your AdSense account.
Step 2: Click “fix now” on the alert on your homepage or click the Sites in the sidebar.

Step 3: Click the download button in the box to get your publisher ID and data to add to the ads.txt file later. google.com, pub-0000000000000000, DIRECT, f08c47fec0942fa0

Step 4: Sign in to your WordPress Website.
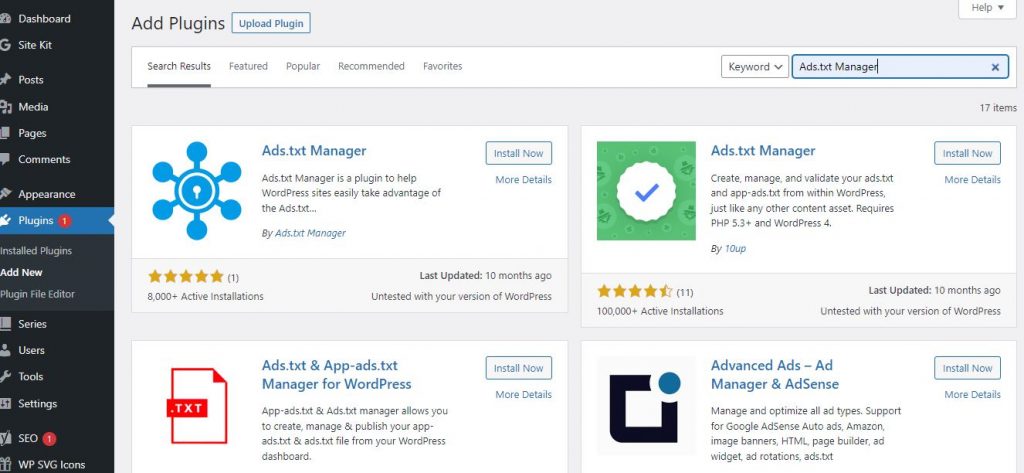
Step 5: In the Dashboard click “add new” in the plugin section.

Step 6: Search by these words in the search box “Ads.txt Manager”

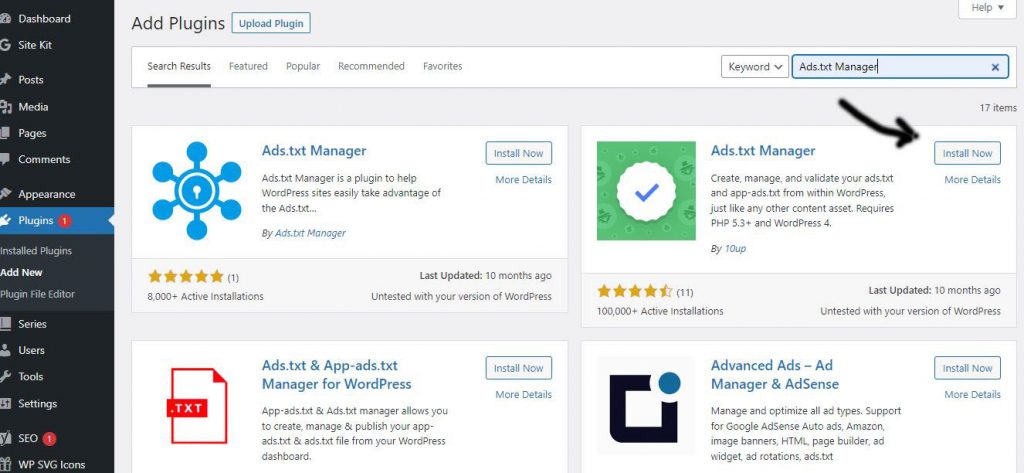
Step 7: Click install on Ads.txt Manager box then click activate.

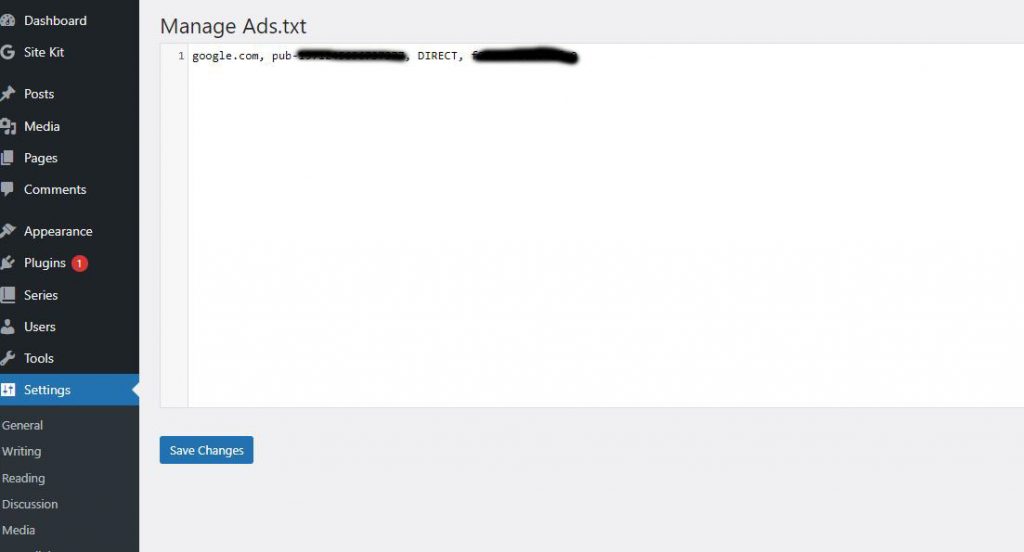
Step 8: Go to “Settings” in the sidebar and click “ads.txt”

Step 9: Copy everything in the file from step 3 and paste them in the text area and click “save changes”

Step 10: To make sure, you added the file in the right place. Open your browser go to “https://your-website-domain/ads.txt” you should see data from step 9.
Note: It may take a few days for your changes to be reflected in your AdSense account. In fact, if your site doesn’t make many ad requests it may take up to a month.
