
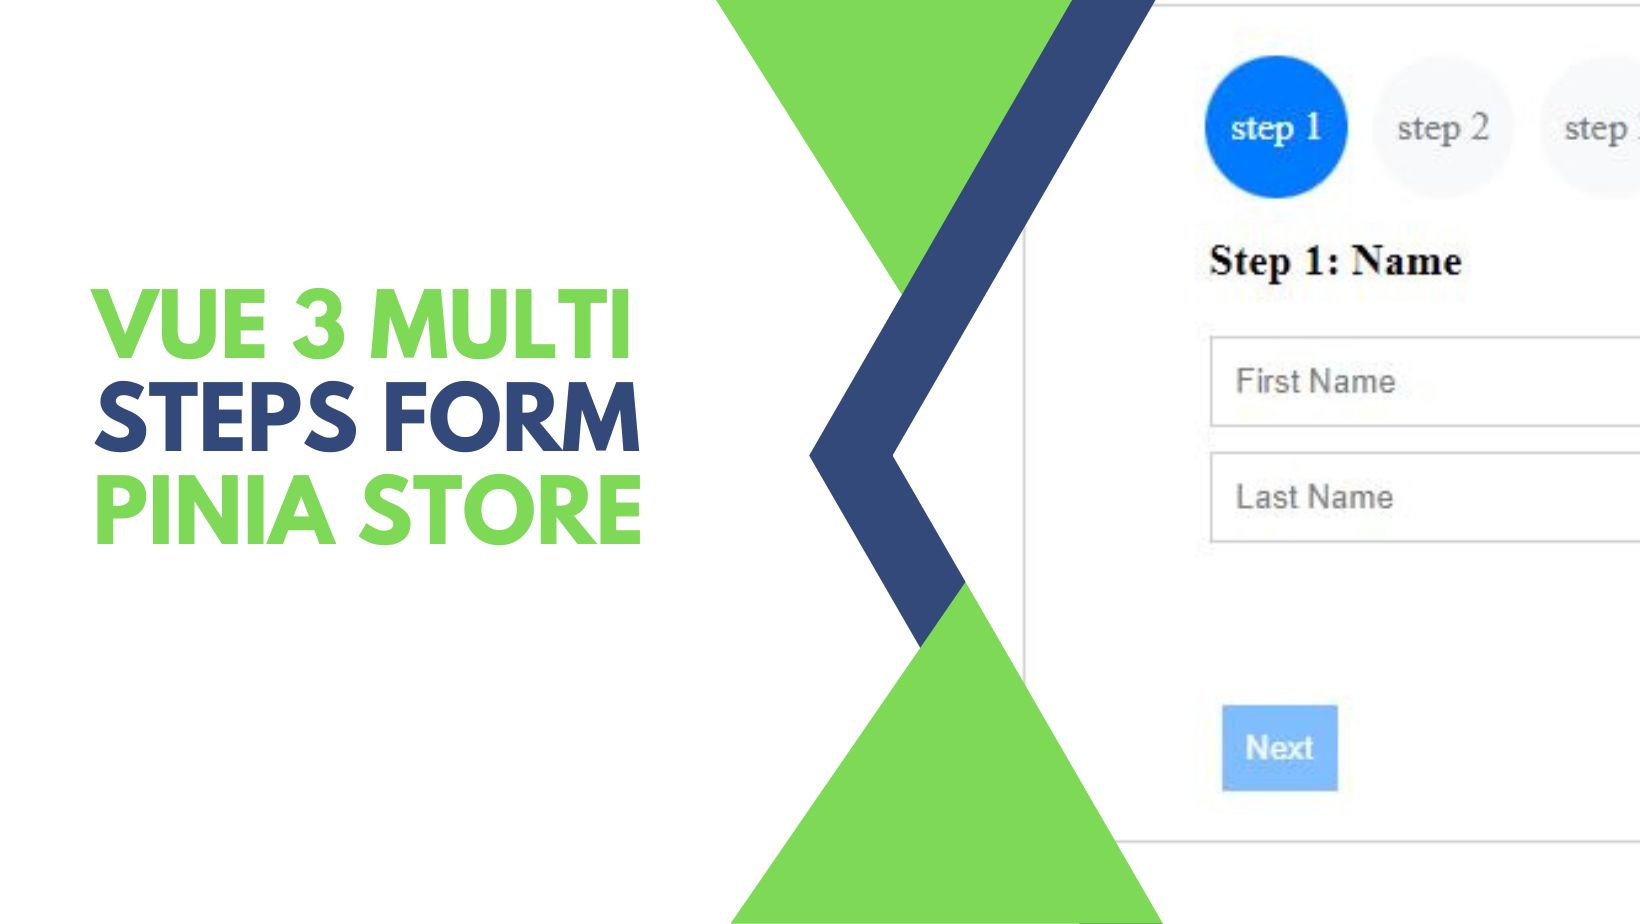
Let’s code a multi-step registration form with validation using Vue.js 3. We will use Vueladite for validation and Pinia store as a state management system to store the form data and steps.
There are other ways to approach this kind of form but I want to try a new way to share and save data. I found this method so close to the service in the angular framework that uses dependency injection and singleton the service class and makes it available anywhere you want. So, I found Pinia can do the same thing as they said on their website “Pinia The intuitive store for Vue.js Type Safe, Extensible, and Modular by design. Forget you are even using a store”.
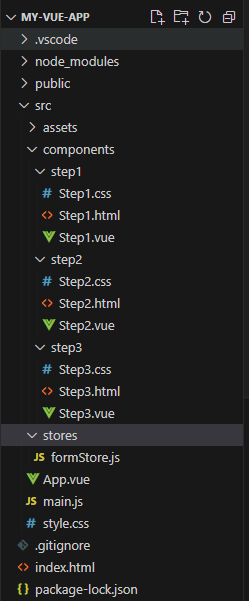
The Muti-steps Form Project Structure
We will have the parent component src\App.vue that will contain the steps indicator as well as the form steps components. We will create the steps components like that src\components\step1\Step1.vue. Finally, it’s up to you to separate the template and CSS into other files as you can see in the photo below.
Creating The project
Let’s create a new project using Vite, so will use the below command.
npm create vite@latest my-vue-app -- --template vueLet’s go to the installation directory and install the dependencies.
cd my-vue-app
npm install
npm run dev
Let’s install Pinia store,
npm install piniaLet’s install Vuelidate
npm install @vuelidate/core @vuelidate/validatorsLet’s run the development server to make sure that there are no problems npm run dev
Pinia Store
Let’s create our store to save the form data and current steps as well as a function to check the current field. Let’s create a new file src\stores\formStore.js
import { defineStore } from 'pinia';

export const FormStore = defineStore('formStore', {
  state: () => ({
    firstName: null,
    lastName: null,
    email: null,
    password: null,
    currentStep:1,
    stepsCompleted:0,
    steps: 3


  }),
  actions: {
     checkFields() {

       this.stepsCompleted = 0
        if(this.firstName && this.flastName){
          this.stepsCompleted = 1
        }
        if(this.firstName && this.lastName && this.email){
          this.stepsCompleted = 2
        }
        if(this.firstName && this.lastName && this.email && this.password){
          this.stepsCompleted = 3
        }
        return this.stepsCompleted;
      }
 }
});
Let’s explain the code, in the state we have the form inputs and we have currentStep to know the current step, stepsCompleted to store the completed steps. we have the total steps steps : 3 as we have 3 steps.
We have a function to get the completed steps checkFields() and it will update stepsCompleted.
Let’s add our store to the app.
import { createApp } from 'vue'
import './style.css'
import App from './App.vue'
import { createPinia } from 'pinia'

const pinia = createPinia()
createApp(App).use(pinia).mount('#app')
That’s all, now you can create as many stores as you want.
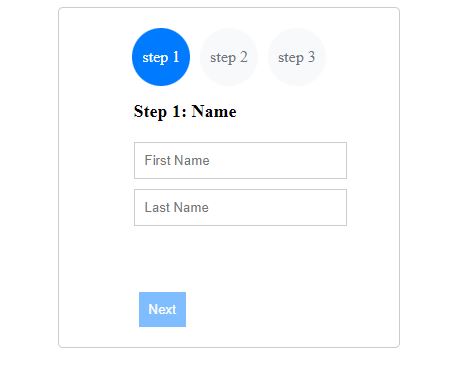
Let’s define our form In src\App.vue The form consists of three steps, each of which is represented by a Vue component that will be created later. The current step of the form is stored in a state variable called formStore.currentStep that we will use to toggle the active step and render the right component step.
<script setup>
import Step1 from './components/step1/Step1.vue';
import Step2 from './components/step2/Step2.vue';
import Step3 from './components/step3/Step3.vue';
import { FormStore } from './stores/formStore';
const formStore = FormStore();

</script>
<template>
  <div class="form-container">
    <div class="step-container">
      <div :class=" formStore.currentStep >= 1? 'Active': 'notActive' ">step 1</div>
      <div :class=" formStore.currentStep >= 2? 'Active': 'notActive' ">step 2</div>
      <div :class=" formStore.currentStep >= 3? 'Active': 'notActive' ">step 3</div>
    </div>
      <Step1 v-if="formStore.currentStep === 1" />
      <Step2 v-if="formStore.currentStep === 2" />
      <Step3 v-if="formStore.currentStep === 3" />
  </div>
</template>
Here is the general style for the form.
.step-container {
  display: flex;
  flex-direction: row;
  gap: 10px; /* Add spacing between steps */
}
/* steps icons styling */
.Active {
  background-color: #007bff;
  color: #fff;
  padding: 20px 10px;
  border-radius: 50%;
  display: inline-block;
}

.notActive {
  background-color: #f8f9fa;
  color: #6c757d;
  padding: 20px 10px;
  border-radius: 50%;
  display: inline-block;
}

/* General form styling */
.form-container {
  min-height: 200px; /* Set minimum height to accommodate buttons */
  display: flex;
  flex-direction: column;
  align-items: center;
  justify-content: end; /* Align buttons at the bottom */
  padding: 20px;
  border: 1px solid #ccc;
  border-radius: 5px;
  margin: 0 auto;
  width: 300px; /* Set width to match form width */
}
.input-container{
  height: 150px;
}
form {
  display: flex;
  flex-direction: column;
  align-items: center;
  width: 300px;
  margin: 0 auto;
}

h2 {
  font-size: 18px;
  margin-bottom: 20px;
}

input {
  width: 100%;
  padding: 10px;
  border: 1px solid #ccc;
  margin-bottom: 10px;
}

.input-errors {
  color: #ff0000;
  margin-bottom: 10px;
}

.error-msg {
  font-size: 12px;
}

button {
  margin-left: 5px;
  padding: 10px;
  background-color: #007bff;
  color: #fff;
  border: none;
  cursor: pointer;
}

/* Disable button if not enabled */
button:disabled {
  opacity: 0.5;
  cursor: not-allowed;
}
Form Components
We will create three form components, one for each step. Let’s create our first step components.
Step 1
The first step will be to enter the first name and last name and we will validate the inputs and enable the next button if the fields are filled.
<script setup>
import { FormStore } from '../../stores/formStore';
import{onMounted, ref, reactive, computed} from 'vue'
import { useVuelidate } from '@vuelidate/core'
import { required } from '@vuelidate/validators'

const formStore = FormStore();
const goNext = ref(false);
const state = reactive({
    firstName: formStore.firstName,
    lastName: formStore.lastName,
    })
const rules =  computed(() => ({
    firstName: { required },
    lastName: { required }
    }))
const v$ = useVuelidate(rules, state)

const canGoNextStep = async () => {
goNext.value = await v$.value.$validate()? true : false;
    if(goNext.value){
        formStore.firstName = state.firstName;
        formStore.lastName = state.lastName;
        formStore.checkFields();
        console.log(v$.value.$validate())
    }
}

const nextStep = () => {
    formStore.currentStep = 2;
    console.log(formStore.firstName)
}
onMounted(() => {
    goNext.value =  formStore.checkFields() >= 1? true : false;
    console.log(formStore.checkFields())
})

</script>
<template src="./Step1.html"></template>
<style scoped style="./step1.css"></style>
Let’s break down the code.
1- Import:
- We imported our Pinia store as
FormStore. onMounted, ref, reactive, computedfrom ‘vue’: Imports Vue-specific functions for managing component lifecycle events, reactive data, and computed properties.useVuelidatethe Vuelidate library, used for form validation.
2- State Variables:
formStore: References the imported FormStore instance.goNext: to track whether to proceed to the next step.state: holds the current state of the form fields (firstName and lastName).
3- Validation:
rules: A computed property that defines validation rules for the firstName and lastName fields as required.v$: The Vuelidate validation instance was created using theuseVuelidatefunction, passing therulesandstateobjects.
4- Navigation:
canGoNextStep: checks whether the form is valid and sets thegoNextvalue accordingly. It uses thev$.value.$validate()method to validate the form and updatesgoNext.valuebased on the validation result. If valid, it updates the FormStore with the current firstName and lastName values and callsformStore.checkFields()to update the completed stepsstepsCompleted.nextStep: this function advances the form to the next step by settingformStore.currentStepto 2.
5- On Mounted:
- We initialize the component state via
onMountedlifecycle hook, It setsgoNext.valuebased on the initial validation of the form usingformStore.checkFields().
6- Templates:
- We separated the template and style in new files.
<template src="./Step1.html"></template><style scoped style=”./step1.css”></style>
<div>
    <h2>Step 1: Name</h2>
    <div class="input-container">
        <div>
            <input type="text" v-model="state.firstName" @input="v$.firstName.$touch();canGoNextStep()" placeholder="First Name">
            <div class="input-errors" v-for="error of v$.firstName.$errors" :key="error.$uid">
                <div class="error-msg">{{ error.$message }}</div>
            </div>
        </div>
        <div>
            <input type="text" v-model="state.lastName" @input="v$.lastName.$touch();canGoNextStep()" placeholder="Last Name">
            <div class="input-errors" v-for="error of v$.lastName.$errors" :key="error.$uid">
                <div class="error-msg">{{ error.$message }}</div>
            </div>
        </div>
    </div>
    <button type="button" :disabled="!goNext" @click="nextStep">Next</button>
</div>
We have two form inputs for the firstName and lastName we used v-model to bind the data with state variables. With every input, we validate the data and check if the user can go to the next step using @input="v$.firstName.$touch();canGoNextStep()".
For the next button, we use the Vue directive to disable the button if the goNext value is false, preventing navigation when the form is invalid and @click="nextStep" the Vue event handler that triggers the nextStep().
Step 2
The second step for entering the validating the email, it’s mostly the same code as step one, but we imported email from @vuelidate/validators and added the back function so that the user can go back, and in onMounted we added goNext.value = formStore.checkFields() >= 2? true : false; check if the user fills the input before or not.
<script setup>
import { FormStore } from '../../stores/formStore';
import{onMounted, ref, reactive, computed} from 'vue'
import { useVuelidate } from '@vuelidate/core'
import { required , email} from '@vuelidate/validators'

const formStore = FormStore();
const goNext = ref(false);
const state = reactive({
    email: formStore.email,
    })

const rules =  computed(() => ({
    email: { required, email },
}))

const v$ = useVuelidate(rules, state)

const canGoNextStep = async () => {
goNext.value = await v$.value.$validate()? true : false;
    if(goNext.value){
        formStore.email = state.email;
        formStore.checkFields();
        console.log(v$.value.$validate())
    }
}
const back = () => {
    formStore.currentStep = 1;
}

const nextStep = () => {
    formStore.currentStep = 3;
}

onMounted(() => {
    goNext.value =  formStore.checkFields() >= 2? true : false;
})

</script>
<template src="./Step2.html"></template>
<style scoped style="./step2.css"></style>
For the template, we will add the back button and email input.
<div>
    <h2>Step 2: email</h2>
    <div class="input-container">
        <div>
            <input type="text" v-model="state.email" @input="v$.email.$touch();canGoNextStep()" placeholder="Email">
            <div class="input-errors" v-for="error of v$.email.$errors" :key="error.$uid">
                <div class="error-msg">{{ error.$message }}</div>
            </div>
        </div>
    </div>
    <button type="button" @click="back">back</button>
    <button type="button" :disabled="!goNext" @click="nextStep">Next</button>
</div>
Step 3
In the third step where we have the submit button, the password input and we don’t have nextStep but we will have CheckCanSubmit function instead.
<script setup>
import { FormStore } from '../../stores/formStore';
import{onMounted, ref, reactive, computed} from 'vue'
import { useVuelidate } from '@vuelidate/core'
import { required } from '@vuelidate/validators'
const formStore = FormStore()
const canSubmit = ref(false)
const goNext = ref(false);
const state = reactive({
    password: formStore.password,
    })
const submit = () => {
  console.log(formStore.state)
}

const rules =  computed(() => ({
    password: { required },
}))

const v$ = useVuelidate(rules, state)

const back = () => {
    formStore.currentStep = 2;
}
const CheckCanSubmit = async () =>{
    // Check the validity of the form inputs
    canSubmit.value = await v$.value.$validate()? true : false;
   // If the form is valid, update the formStore properties
    if(canSubmit.value){
        formStore.password = state.password;
        formStore.checkFields();
    }
}
onMounted(() => {
    canSubmit.value = formStore.checkFields() >= 3? true : false
})

</script>
<template src="./Step3.html"></template>
<style scoped style="./step3.css"></style>
The CheckCanSubmit function is an asynchronous function that is responsible for checking whether the form can be submitted. It does this by checking the validity of the form inputs and updating the canSubmit state variable accordingly. If the form is valid, it also updates the formStore.password and formStore.checkFields() properties.
<div>
    <h2>Step 3: password</h2>
    <div class="input-container">
        <div>
            <input type="text" v-model="state.password" @input="v$.password.$touch();CheckCanSubmit()" placeholder="password">
            <div class="input-errors" v-for="error of v$.password.$errors" :key="error.$uid">
                <div class="error-msg">{{ error.$message }}</div>
            </div>
        </div>
    </div>
    <button type="button" @click="back">back</button>
    <button type="button" :disabled="!canSubmit" @click="submit">submit</button>

</div>
In the HTML part, we will have back and submit buttons as well as the password input.
Conclusion
We create a multi-step form using Pinia store for state management and save the data of the form as well as the current step and completed steps. we separated the javascript, HTML, and CSS for each component to make it clearer. I hope that was useful for you thank you.