

Let’s Create drag and drop upload Vue.js 3 component with Dropzone, the JavaScript libraries to handle dropped files. We use the original pure JavaScript Dropzone.js.
I wanted to create drag and drop form input to upload files, I used to use Dropzone with HTML & CSS but in vue.js, I never did that, I always used bootstrap file input. It supports dropping files but unlike Dropzone, it doesn’t display image thumbnail previews and progress bars. I have tried vue3-dropzone also, big disappointment! I wasted my time.
Dropzone features:
- Customizable.
- Image thumbnail previews.
- Progress Bars.
- Multiple files and synchronous uploads.
- Chunked uploads.
- Browser image resizing.
- And more.
In the example below I’m using Bootstrap 5 and Bootstrap Icons in Vue 3 Vite project. For making this tutorial shorter and to the point, I’m not going through that, and If you want to learn more about How to use them, here are some helpful tutorials.
Dropzone
Dropzone.js is free, fully open source, and one of the most popular drag and drop JavaScript libraries. Let’s install it.
npm install --save dropzone

//or

yarn add dropzone
Now we are ready to use it.
Drag and Drop Upload Component
Let’s create Vue.js single file component so we can use it wherever we want. We will upload the file automatically, once it’s dropped in the upload box. So you need to create a backend API to handle that. But don’t worry I will cover most of what you need in the front end such as header and Authorization.
Let’s create the Dropzone component src\components\Dropzone.vue
<template>
<div>
<div ref="dropRef" class="dropzone custom-dropzone"></div>
<div class="dropzone preview-container"></div>
</div>
</template>
<script>
import { ref, onMounted, defineComponent } from 'vue'
import { Dropzone } from 'dropzone'
import { useStore } from 'vuex'
export default defineComponent({
name: 'Dropzone',
props:['paramName'],
setup(props) {
//using vuex
const store = useStore()
//getting the div container
const dropRef = ref(null)
//creating html custom preview for uploading files
const customPreview = `
<div class="d-flex flex-wrap dz-preview dz-processing dz-image-preview dz-complete">
<div class="dz-image">
<img data-dz-thumbnail>
</div>
<div class="dz-details">
<div class="dz-size"><span data-dz-size></span></div>
<div class="dz-filename"><span data-dz-name></span></div>
</div>
<div class="dz-progress">
<span class="dz-upload" data-dz-uploadprogress></span>
</div>
<div class="dz-error-message"><span data-dz-errormessage></span></div>
<div class="dz-success-mark">
<i class="bi bi-check-circle-fill" style="font-size: 2rem; color: green;"></i>
</div>
<div class="dz-error-mark">
<i class="bi bi-exclamation-circle-fill" style="font-size: 2rem; color: red;"></i>
</div>
</div>
`
onMounted(() => {
// Configuring Dropzone and Adding to div element
if(dropRef.value !== null) {
new Dropzone(dropRef.value, {
url: 'https://backendUrl/uploadFile/',//backend url
method: 'POST',
headers:{Authorization: 'Bearer ' + store.state.token,}, // getting API access token form vuex store to be sent with request
paramName:props.paramName // input name
acceptedFiles:".jpg,.png,.jpeg,.webp,.pdf,.doc,.docx,.zip" // accepted files
previewTemplate: customPreview,
previewsContainer: dropRef.value.parentElement.querySelector('.preview-container'),
})
// customizing the input field of dropzone
if(dropRef.value.querySelector('.dz-default')) {
dropRef.value.querySelector('.dz-default').innerHTML = `
<div style="display: flex; justify-content: center;">
<i class="bi bi-cloud-arrow-up-fill" style="font-size: 5rem;"></i>
</div>
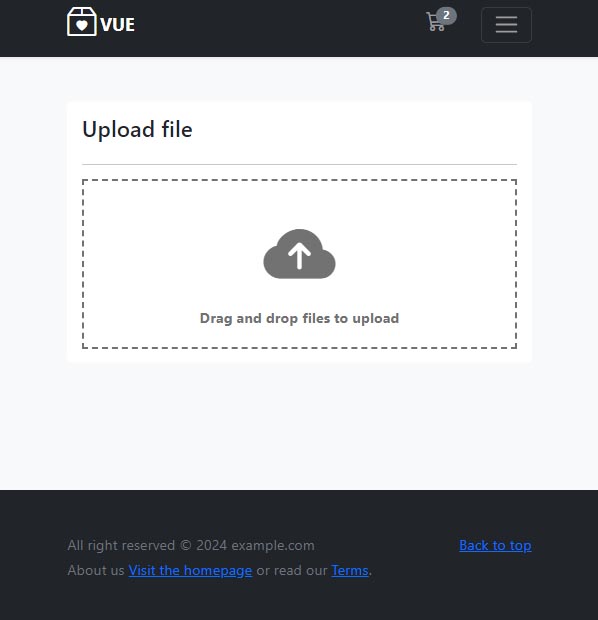
<p style="text-align: center; margin: 0;"><strong>Drag and drop files to upload</strong></p>
`
}
}
})
return {
dropRef
}
}
})
</script>
<style scoped>
.custom-dropzone {
border-style: dashed;
border-width: 3px;
padding: 20px;
color:rgb(114, 114, 114)
}
</style>
Let’s explain the code, First, we added two div elements as containers for the upload box and image thumbnail previews and we give the first one ref="dropRef" so we can call it later in setup().
props:['paramName']: We have created props for the input name such as image, file, or avatar.
const store = useStore(): This is to use the Vuex store in setup().
customPreview this variable is for creating HTML custom previews for uploading files and we will add it to previewTemplate option. We used the dropzone classes here.
After that, we configured Dropzone and added it to the div element. We added the backend URL with the “post” method and we supposed that it was a secured API so we send the access token with bearer Authorization.
previewsContainer, this is for the upload box to customize with HTML and CSS, we did that with the below “if” condition of it.
Using Dropzone component
Now we can call our Drag and Drop Upload Component as we want. for example, below, we are using it in the view component src\views\UploadFiles.vue
<template>
<section class="h-100 h-custom bg-light min-h-content" >
    <div class="container py-5 h-100">
        <div class="row d-flex justify-content-center align-items-center h-100">
            <div class="col d-flex justify-content-center align-items-center">

                <div class="card border-0 " style="width:100%">
                    <div class="card-body">
                        <h3 class="mb-4">Upload file</h3>
                        <hr/>
                        <Dropzone paramName="thefile"/>
                    </div>
                </div>
            </div>
        </div>
    </div>
</section>
</template>
<script>
import Dropzone from '../components/Dropzone.vue'

export default {
    setup() {

    },
    components:{Dropzone}
}
</script>
.min-h-content{
min-height: calc(100vh - 82px - 148px);
}This is a sample example of the most use case and you can learn more about the other options of the library from the doc.
I hope that was helpful to you, thanks.