

Let’s have WebSockets for Node.js and Express.js framework. One of the confusing things is to add Socket.IO to the Express application When you use the Express application generator.
npx express-generatorIn this tutorial, we’ll break it down, step by step, we will create a real-time notification application That will be one of a series of tutorials for real-time applications and we will go back to this tutorial as a reference for setting up WebSockets with node.js.
Creating Express Application
Here is my Enverinoment, I’m using node.js 20 with Express 4.18 on Ubuntu desktop 22.04.3, Let’s use the application generator tool “express-generator” to create an application skeleton quickly.
npx express-generatorThen we will install the dependencies
npm installAfter installation, you can run the application to make sure everything is ok. Then load http://localhost:3000/ in your browser to access the app. To run the app if you are using Visual Studio Code, just click on app.js file and f5, or from the Run menu select Start Debugging. For other methods:
On MacOS or Linux, run the app with this command:
$ DEBUG=myapp:* npm start
For Windows Command Prompt, use this command:
set DEBUG=myapp:* & npm start
Or Windows PowerShell, use this command:
PS> $env:DEBUG='myapp:*'; npm start
Finally I would like to use ejs template engine instead of jade or pug, but it’s up to you and you can skip this part.
Why do I use ejs? because it’s easier to show the plain javascript for using Socket.io as EJS uses JavaScript code in simple, straightforward scriptlet tags. Just write JavaScript that emits the HTML you want, and get the job done. Let’s install it and install express-ejs-layouts for adding layout features for our application frontend.
npm install ejs express-ejs-layoutsvar createError = require('http-errors');
//
// imported express-ejs-layouts
var expressLayouts = require('express-ejs-layouts');
//
var app = express();
// view engine setup
app.set('views', path.join(__dirname, 'views'));
app.set('view engine', 'ejs');
app.use(expressLayouts);
//In app.js we imported express-ejs-layouts as var expressLayouts = require('express-ejs-layouts'); and made the express app using it as we changed the template engine and app.set('view engine', 'ejs'); and added the layout we just imported app.use(expressLayouts);
Installing Socket.IO For Backend
Let’s install Socket.IO for the backend API.
npm install socket.io
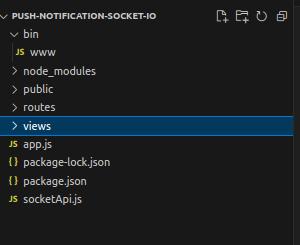
Let’s create a new file in the root project folder socketApi.js for adding the WebSocket code logic and then we will import it to bin/www
Here’s the code of socketApi.js
const io = require( "socket.io" )();
const socketapi = {
    io: io
};

// Add your socket.io logic here!

//handling the client connection
io.on( "connection", function( socket ) {
    console.log( "A user connected" );
});

// for sending Notifications
socketapi.sendNotification = (msg)=>{
    io.emit('notification', msg);
}
// end of socket.io logic

module.exports = socketapi;
Explaination:
- We Imported and Instantiated Socket.IO
const io = require( "socket.io" )(); - Then we created an object called
socketapi. - We handled the client connection by Setting up an event listener for the “connection” event, which is triggered when a new client connects to the server.
io.on( "connection", function( socket ) - We defined
sendNotificationfunction to send notifications that usesio.emit("notification", msg)to broadcast the notification event to all connected clients, along with the specified message. - Finally, we exported the
socketapimodulemodule.exports = socketapi;
Let’s integrate our socket.io server.
var app = require('../app');
var debug = require('debug')('push-notification-socket-io:server');
var http = require('http');
var socketapi = require("../socketApi");

//
/**
 * Create HTTP server.
 */

var server = http.createServer(app);
socketapi.io.attach(server);

//
var socketapi = require("../socketApi");: We imported thesocketapimodule, containing the Socket.IO instance and notification function, from a separate file.socketapi.io.attach(server);We integrated Socket.IO the server with the HTTP server.
Let’s make the routes. We will have two routes one for the home page and the second for sending a notification to the home page.
By default, express has this page routes/index.js that we added our routes to it.
var express = require('express');
var router = express.Router();
var socketapi = require('../socketApi')

/* GET home page. */
router.get('/', function(req, res, next) {
  res.render('index', { title: 'Express',layout:'layout' });
});

/* Send Notification. */
router.get('/push', function(req, res, next) {
  socketapi.sendNotification('hello user');
  res.send('ok',200);
});

module.exports = router;
var socketapi = require('../socketApi');: We imported thesocketapimodule to interact with the Socket.IO server for sending notifications.- We Defined a route for the root path (
/), handling GET requests to the home page. res.render('index', { title: 'Express', layout: 'layout' });: Renders a template file namedviews/index.ejs(containing HTML and dynamic content), setting the title to “Express” and using a layout template namedviews/layout.ejs. We need to create these files in the view directory.- We defined another route for the /push path, handling GET requests to send notifications.
- Called the
sendNotificationfunction (imported fromsocketapi) to broadcast the message “hello user” to all connected clients usingSocket.IO.
Now our backend is ready.
Installing Socket.IO For Frontend
The fun part is the front-end let’s integrate the webSockets library via CDN in the views/layout.ejs file.
<!DOCTYPE html>
<html lang="en">
<head>
  <meta charset="UTF-8">
  <meta name="viewport" content="width=device-width, initial-scale=1.0">
  <link rel="stylesheet" href="/stylesheets/style.css">
  <script src="https://cdn.socket.io/4.7.4/socket.io.min.js"></script>
  <title><%- title %></title>
</head>
<body>
  <script>
    const socket = io();
  </script>
  <%- body %>
</body>
</html>
We instantiated a Socket.IO client instance, establishing a connection to the Socket.IO server running on the backend const socket = io();
We have Dynamic Content <%- title %>: Placeholder for a dynamic title and <%- body %>: Placeholder for the main content of the page.
Let’s code the views/index.ejs for the main content of the home page.
<h1><%- title %></h1>
<p id="message"></p>
<script>
const message = document.getElementById('message');
socket.on('notification', (msg) => {
    console.log('message: ' + msg);
    message.innerHTML = msg
  });

</script>
<%- title %>: Inserts a dynamic heading based on the title value.<p id="message"></p>:this empty paragraph element with the ID “message”, is intended to display notifications and we get a reference to the paragraph element withconst message = document.getElementById('message');socket.on('notification', (msg) => { … });: Sets up an event listener for the “notification” event, which is triggered when the server sends a notification through Socket.IO.message.innerHTML = msg;: Updates the content of the “message” paragraph element with the received message, displaying it on the page.
Conclusion
We have created an express application with a WebSockets server to serve real-time notifications. We have integrated Socket.io with express.js, We created socketApi.js to instantiate Socket.IO and hold all Websockets API and logic. We called that file in bin/www to integrate the Websockets server with HTTP server. We can import socketApi.js to use its function with routes.