

This tutorial will explain the easiest way to make an authentication system using Node.js and Mongo Database using JWT and Mongoose
Express, the web framework for node.js is a good choice for building our system, and of course, Mongoose provides a schema-based solution to model our application data. It includes validation, query building, and more.
Installing Node Dependencies
Let’s use the Express application generator tool to create our application skeleton quickly.
npx express-generatorThen let’s install npm packages
npm installAfter installing, we need to run our application to make sure everything is installed correctly.
Select the app.js and click F5 in Visual Studio Code then select Node.js from the menu and open http://localhost:3000/ the in the browser. You should see the Welcome to Express message.
Let’s continue installing our packages.
npm install mongoose jsonwebtoken dotenv bcryptjsCreating .env file
This file is for saving the environment variable and configuration data like access tokens and keys separated from the code.
We put the .env file in the root folder of our project and add the loading code of dotenv in the app.js at the top as the following.
//loading .env file
require("dotenv").config();
Configuring MongoDB Connection
It’s the time to see the magic of mongoose , Let’s add the MongoDB URL in the .env file. I have mongo installed on my computer and I named my database ‘book-store’.
MONGODB_URL = mongodb://localhost:27017/book-store
We need to create a config folder in our root folder of the application so we save our configuration files in it.
Let’s create the database configuration file as config/database.js. and add the following code.
const mongoose = require("mongoose");


 // calling the url for .env file
const { MONGODB_URL } = process.env;

exports.connect = () => {
    // Connecting to the database
    mongoose
      .connect(MONGODB_URL)
      .then(() => {
        console.log("successfully connected to mongodb");
      })
      .catch((error) => {
        console.log("connection failed to mongodb");
        console.error(error);
      });
  };
Code explanation:
- We called the database URL for the .env file
MONGODB_URL - We used mongoose to connect the database it will print in the console the connection status.
In app.js, We will call the configuration file as the following
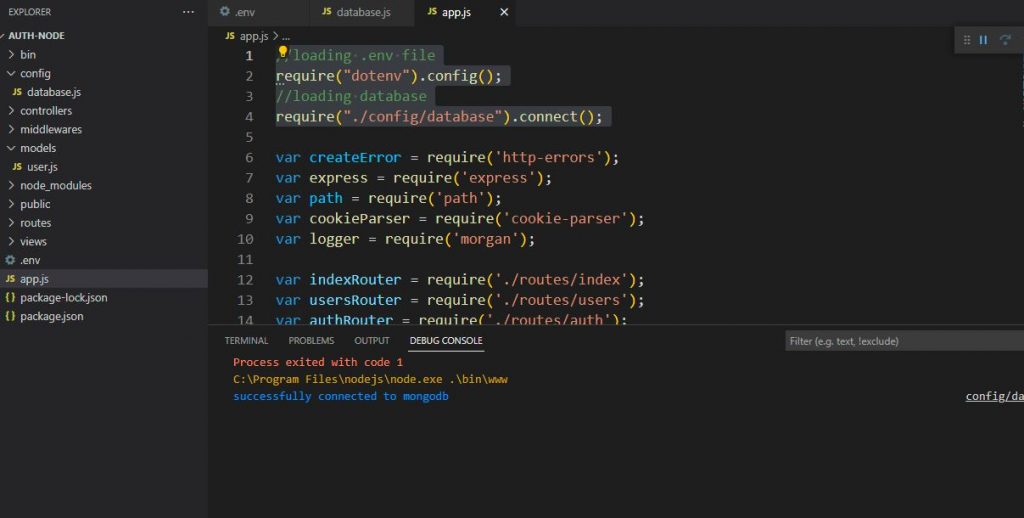
//loading .env file
require("dotenv").config();

//loading database
require("./config/database").connect();
Start the server to connect to MongoDB and see the status message in the console.
MongoDB Users Model With Validation.
Mongoose will create the user’s collection and validate the data for use.
Let’s add the following code in a new file in models/user.js
const mongoose = require("mongoose");


const userSchema = new mongoose.Schema
({
  first_name: { type: String, required: true},
  last_name: { type: String, required: true},
  email: { type: String, unique: true, required: true},
  password: { type: String, required: true},
  token: { type: String },
});


module.exports = mongoose.model("user", userSchema);
we created the user model schema with validation but we have a problem we need to make the email unique but mongoose believes that “The unique Option is Not a Validator”, so we need a plugin to do that.
Let’s install mongoose-unique-validator
npm i mongoose-unique-validatorWe need to modify our code to be.
const mongoose = require("mongoose");
let uniqueValidator = require('mongoose-unique-validator');

const userSchema = new mongoose.Schema
({
  first_name: { type: String, required: true},
  last_name: { type: String, required: true},
  email: { type: String, unique: true, required: true},
  password: { type: String, required: true},
  token: { type: String },
});

userSchema.plugin(uniqueValidator);

module.exports = mongoose.model("user", userSchema);
Adding auth routes and controllers
We will create two routes one for login and another for registration.
In the routes folder we will create “auth.js” file and adding the following code.
var express = require('express');
var router = express.Router();


//calling the functions from the controller
const { register,login} = require("../controllers/authController");

router.post('/register',register );
router.post('/login',login );


 module.exports = router;
We will create the controller in controllers/authController.js and add the register and login functions.
Creating the registration function
const User = require("../models/user");
const bcrypt = require("bcrypt");

exports.register = async (req, res, next) => {
    try {
      //get the form data
      const { first_name, last_name, email, password } = req.body;
       //hash the password
      let encryptedPassword = await bcrypt.hash(password, 10);
      // validate the data and creating new user
      const user = await User.create({
        first_name,
        last_name,
        email: email.toLowerCase(),
        password: encryptedPassword,
      });
      // sending success message
       res.status(200).json({
        success:true,
        message: "user registered succefully",
        user:user,
      });

    } catch (error) {
      // sending error message
        console.log(error)
          res.status(400).json({
              message: "user register failed",
               error,
            });
      }
};
code explanation
- We created the register function for getting the data and validating it and saving it by mongoose in the MongoDB user collection.
bcrypt.hashfor hashing the password for more security.- We called the
Usermodel for saving the user data and it returns the validation errors automatically.
Creating the login function
Let’s create the login function but we need to add jsonwebtoken for creating access token via a private key for generating the token.
In the .env file, we will create private ke PRIVATE_KEY that stores a random String
MONGODB_URL = mongodb://localhost:27017/book-store
PRIVATE_KEY= a@$SDFF*54dcs!bm*FCV{]qVnnm3#
In the controller
const User = require("../models/user");
const bcrypt = require("bcrypt");

var jwt = require('jsonwebtoken');
const { PRIVATE_KEY } = process.env;
The login function will be
exports.login = async (req, res, next) => {
  try {
    //get the form data
    const {email, password } = req.body;

    //get user data by email
    let user = await User.findOne({email:email})

    //compare user password with the hashed one
    let isMatch = await bcrypt.compare(req.body.password, user.password);

    //send error message if passwords are not matched
    if (!isMatch) {
      return res.status(401).json({
        error: "incorrect email or password",
      });
    }

   //creating access token via JWT and save it in the user collection
    let token = jwt.sign({ _id: user._id, email: user.email  }, PRIVATE_KEY);
    user.token = token
    await  user.save({validateModifiedOnly: true,});
    user.password = '';

    //send the login data
      res.status(200).json({
       success:true,
       user:user
      });

  } catch (error) {
      // sending error message
      console.log(error)
        res.status(400).json({
            message: "user login failed",
            err: error,
          });
    }
};
Code explanation:
- We get the user data by email then we compare user password with the hashed one in the database.
- We use JSON Web Tokens
jwtfor creating access tokens if the user data is correct. - Finally, we send the data in JSON
We have another problem we can’t validate the login data if the password and email are not empty, we want to make them required. and for the sick of clean coding, we will use express-validator and create a middleware.
npm install --save express-validatorlet’s create a middleware validator for login. create a new file middlewares\validators\loginValidator.js
const { body,check , validationResult } = require('express-validator')
const User = require("../../models/user");
const bcrypt = require("bcrypt");
const loginValidationRules = () => {
  return [
    body('password').not().isEmpty(),
    body('email').isEmail(),
    body('email').custom(value => {
      return User.findOne({email:value}).then(user => {
        if (!user) {
          return Promise.reject('E-mail is not registered');
        }
      });
    }),

  ]
}

const loginValidate = (req, res, next) => {
  const errors = validationResult(req)
  if (errors.isEmpty()) {
    return next()
  }
  const extractedErrors = []
  errors.array().map(err => extractedErrors.push({ [err.param]: err.msg }))

  return res.status(422).json({
    errors: extractedErrors,
  })
}

module.exports = {
  loginValidationRules,
  loginValidate,
}loginValidationRulesfor creating the validation rules as we want the email and password to be required and email must exist in the database.loginValidatefor returning the validation errors.
In the routes\auth.js file we will add the middleware.
var express = require('express');
var router = express.Router();
//calling the functions from the controller
const { register,login} = require("../controllers/authController");
const {loginValidationRules,loginValidate} = require("../middlewares/validators/loginValidator");

router.post('/register',register );
router.post('/login',loginValidationRules(), loginValidate, login );


 module.exports = router;
Let’s add our routes to the app.js
//
var indexRouter = require('./routes/index');
var usersRouter = require('./routes/users');
var authRouter = require('./routes/auth');
//
app.use('/', indexRouter);
app.use('/users', usersRouter);
app.use('/auth', authRouter);
We can test the code via Postman.
http://localhost:3000/auth/register for registration
http://localhost:3000/auth/login for login
By that, we reached the end of this tutorial.
Next Part: Admin Routes And Auth Middleware express JWT in Node.js | Book Store Course part 2