
Sometimes we need to build a single-page application or we just need two applications to talk to each other for example backend Laravel app needs to communicate with the frontend Vuejs app, here comes the RESTful API solution.
REST stands for Representational State Transfer, while API stands for Application Programming Interface. Hackers can attack your application via API so we should secure them with an Access token, we are going to use Laravel Sanctum that provides a featherweight authentication system for single-page applications and mobile applications. Each user of our application can generate multiple API tokens for their account. The tokens specify which actions are allowed to perform.
How RESTful APIs work in our Application.
- User: hello Laravel! here is my email and password can I have an access token.
- Laravel: Let me check, Yeah, Your are registed in our database before, here is your access token (assafsa3433f33f3).
- User: Laravel I need to create a new post, here is the form data.
- Laravel: In this form data, there is no access token. Who are you? I don’t know you!
- User: Sorry I forgot to included the access token. Here is my token (assafsa3433f33f3).
- Laravel: Let me check, The token is in our databse, now I know everything about you, Hello Mr. User, I have ceated the post for you.
- User: thank you.
What you will learn in this tutorial.
- Laravel app installation.
- Database configuration.
- Creating tables and migration.
- Laravel Sanctum installation.
- Register,Login and Logout via Restful API.
- Creating PostController and model For Restful API.
- Creating API routes.
- Using Postman for testing the Restful API.
Laravel app installation.
We will create a Laravel application via Composer, you should have PHP and Composer installed.
composer create-project laravel/laravel crud-app
cd example-app
we will run Laravel’s local development server using the Artisan CLI command for making sure that the installation went right, you should see the Laravel welcome page.
php artisan serveDatabase configuration.
I’m using Xampp as a local server. I have created a database with the name “crud-app” in phpMyAdmin. In the .env file, we will configure our new database connection.
DB_CONNECTION=mysql
DB_HOST=127.0.0.1
DB_PORT=3306
DB_DATABASE=crud-app
DB_USERNAME=root
DB_PASSWORD=
Creating tables and migration.
We will create a migration file for creating the “posts” table in the database, we will use the below artisan command and make user you are in the root directory of the crud-app project.
php artisan make:migration create_post_table --create=poststhen open our new file in “database\migrations”, its name will be a date following by create_post_table.php for example “2021_08_02_084303_create_post_table.php”.
Add the following changes to the file.
<?php

use Illuminate\Database\Migrations\Migration;
use Illuminate\Database\Schema\Blueprint;
use Illuminate\Support\Facades\Schema;

class CreatePostTable extends Migration
{
    /**
     * Run the migrations.
     *
     * @return void
     */
    public function up()
    {
        Schema::create('posts', function (Blueprint $table) {
            $table->id();
            $table->string('title');
            $table->text('description');
            $table->timestamps();
        });
    }

    /**
     * Reverse the migrations.
     *
     * @return void
     */
    public function down()
    {
        Schema::dropIfExists('posts');
    }
}
Let’s add our table to the database via this artisan command.
php artisan migrateLaravel Sanctum installation.
We will install sanctum for creating the access token and authentication via the following code.
composer require laravel/sanctumNext, you should publish the Sanctum configuration and migration files
php artisan vendor:publish --provider="Laravel\Sanctum\SanctumServiceProvider"Sanctum will create one database table in which to store API tokens so will migrate again.
php artisan migrateWe should add Sanctum’s middleware to our API middleware group in the app/Http/Kernel.php file
'api' => [
    \Laravel\Sanctum\Http\Middleware\EnsureFrontendRequestsAreStateful::class,
    'throttle:api',
    \Illuminate\Routing\Middleware\SubstituteBindings::class,
],
Then will add usePersonalAccessTokenModel method provided by Sanctum in app\Providers\AppServiceProvider.php file.
<?php

namespace App\Providers;

use Illuminate\Support\ServiceProvider;
use Laravel\Sanctum\PersonalAccessToken;
use Laravel\Sanctum\Sanctum;

class AppServiceProvider extends ServiceProvider
{
    /**
     * Register any application services.
     *
     * @return void
     */
    public function register()
    {
        //
    }

    /**
     * Bootstrap any application services.
     *
     * @return void
     */
    public function boot()
    {
        Sanctum::usePersonalAccessTokenModel(PersonalAccessToken::class);
    }
}
For creating personal access tokens to authenticate API requests we add Laravel\Sanctum\HasApiTokens trait to the User model app\Models\User.php
use Laravel\Sanctum\HasApiTokens;

class User extends Authenticatable
{
    use HasApiTokens, HasFactory, Notifiable;
}
Register,Login and Logout via Restful API.
we will create 2 functions one for register and one for login and they will return Access token via Json respond. Let’s create out AuthController
php artisan make:controller auth\AuthController Add this code to app\Http\Controllers\auth\AuthController.php
<?php

namespace App\Http\Controllers\auth;

use App\Http\Controllers\Controller;
use Illuminate\Http\Request;
use Validator;
use Hash;
use App\Models\User;
use Auth;
class AuthController extends Controller
{
    public function register(Request $request)
    {
        /**Validate the data using validation rules
        */
        $validator = Validator::make($request->all(), [
            'name' => 'required',
            'email' => 'required|unique:users,email',
            'password' => ['required','string','min:6'],
        ]);

        /**Check the validation becomes fails or not
        */
        if ($validator->fails()) {
            /**Return error message
            */
            return response()->json([ 'error'=> $validator->errors() ]);
        }

        /**Store all values of the fields
        */
        $newuser = $request->all();

            /**Create an encrypted password using the hash
        */
        $newuser['password'] = Hash::make($newuser['password']);
        /**Insert a new user in the table
        */
        $user = User::create($newuser);

            /**Create an access token for the user
        */
        $success['token'] =  $user->createToken('super_admin', ['app:all'])->plainTextToken;
        /**Return success message with token value
        */
        return response()->json(['success'=>$success], 200);
    }
    /**************************************** */
    public function login(Request $request)
    {
        /**Read the credentials passed by the user
        */
        $credentials = [
            'email' => $request->email,
            'password' => $request->password
        ];

        /**Check the credentials are valid or not
        */
        if( auth()->attempt($credentials) ){
            /**Store the information of authenticated user
            */
            $user = Auth::user();
            /**Create token for the authenticated user
            */
            $user->tokens()->delete();
            $success['token'] = $user->createToken('super_admin', ['app:all'])->plainTextToken;
            $success['name'] = $user->name;

            return response()->json(['success' => $success], 200);
        } else {
            /**Return error message
            */
            return response()->json(['error'=>'Unauthorised'], 401);
        }
    }
    /************************ */
    public function logout(Request $request)
    {
        $user = Auth::user();
        /**Create token for the authenticated user
        */
        $user->tokens()->delete();
        $success['status'] = "logged out";
        return response()->json(['success' => $success], 200);
    }
}
Creating Post Controller and model.
Our database is ready now, so we need to create “PostController” and “Post” model for Adding, Editing, Showing, and Deleting posts. Let’s do this.
php artisan make:controller PostController --resource --model=PostOpen the “app\Http\Controllers\PostController.php” file and make the following changes.
<?php

namespace App\Http\Controllers;

use App\Models\Post;
use Illuminate\Http\Request;

class PostController extends Controller
{
    /**
     * Display a listing of the resource.
     *
     * @return \Illuminate\Http\Response
     */
    public function index()
    {
        $success['post'] = Post::latest()->get();

        return response()->json(['success'=>$success], 200);

    }

    /**
     * Show the form for creating a new resource.
     *
     * @return \Illuminate\Http\Response
     */
    public function create()
    {
       //
    }

    /**
     * Store a newly created resource in storage.
     *
     * @param  \Illuminate\Http\Request  $request
     * @return \Illuminate\Http\Response
     */
    public function store(Request $request)
    {
        $request->validate([
            'title' => 'required',
            'description' => 'required',
        ]);

        $success['post'] = Post::create($request->all());

        return response()->json(['success'=>$success], 200);
    }

    /**
     * Display the specified resource.
     *
     * @param  \App\Models\Post  $post
     * @return \Illuminate\Http\Response
     */
    public function show(Post $post)
    {
        $success['post'] =  $post;
        return response()->json(['success'=>$success], 200);
    }

    /**
     * Show the form for editing the specified resource.
     *
     * @param  \App\Models\Post  $post
     * @return \Illuminate\Http\Response
     */
    public function edit(Post $post)
    {
        //
    }

    /**
     * Update the specified resource in storage.
     *
     * @param  \Illuminate\Http\Request  $request
     * @param  \App\Models\Post  $post
     * @return \Illuminate\Http\Response
     */
    public function update(Request $request, Post $post)
    {
        $request->validate([
            'title' => 'required',
            'description' => 'required',
        ]);

        $post->update($request->all());
        $success['post'] =  $post->refresh();
        return response()->json(['success'=>$success], 200);
    }

    /**
     * Remove the specified resource from storage.
     *
     * @param  \App\Models\Post  $post
     * @return \Illuminate\Http\Response
     */
    public function destroy(Post $post)
    {
        $post->delete();

        $success['message'] =  'deleted';

        return response()->json(['success'=>$success], 200);
    }
}
Add the following modification to app\Models\Post.php
<?php

namespace App\Models;

use Illuminate\Database\Eloquent\Factories\HasFactory;
use Illuminate\Database\Eloquent\Model;

class Post extends Model
{
    use HasFactory;
    protected $fillable = [
        'title', 'description'
    ];
}
Creating API routes.
Open routes\api.php file to add our RESTful API Route. we have unprotected routes for login and registeration, those routes doesn’t need access token because these routes give us the access tokens and we have the protected routes that need access token to perform the request When making requests using API tokens, the token should be included in the Authorization header as a Bearer token.
<?php

use Illuminate\Http\Request;
use Illuminate\Support\Facades\Route;
use App\Http\Controllers\auth\AuthController;
use App\Http\Controllers\PostController;
/*
|--------------------------------------------------------------------------
| API Routes
|--------------------------------------------------------------------------
|
| Here is where you can register API routes for your application. These
| routes are loaded by the RouteServiceProvider within a group which
| is assigned the "api" middleware group. Enjoy building your API!
|
*/

//unprotected routes
Route::post('/register', [AuthController::class, 'register']);
Route::post('/login', [AuthController::class, 'login']);

// protected routes by sanctum token
Route::middleware('auth:sanctum')->group(function () {
    Route::post('/logout', [AuthController::class, 'logout']);
    Route::resource('/post', PostController::class);
});
Using Postman for testing the Restful API.
Finally, testing the app. I user postman for sending request to laravel app. you can find it here here, first start laravel server.
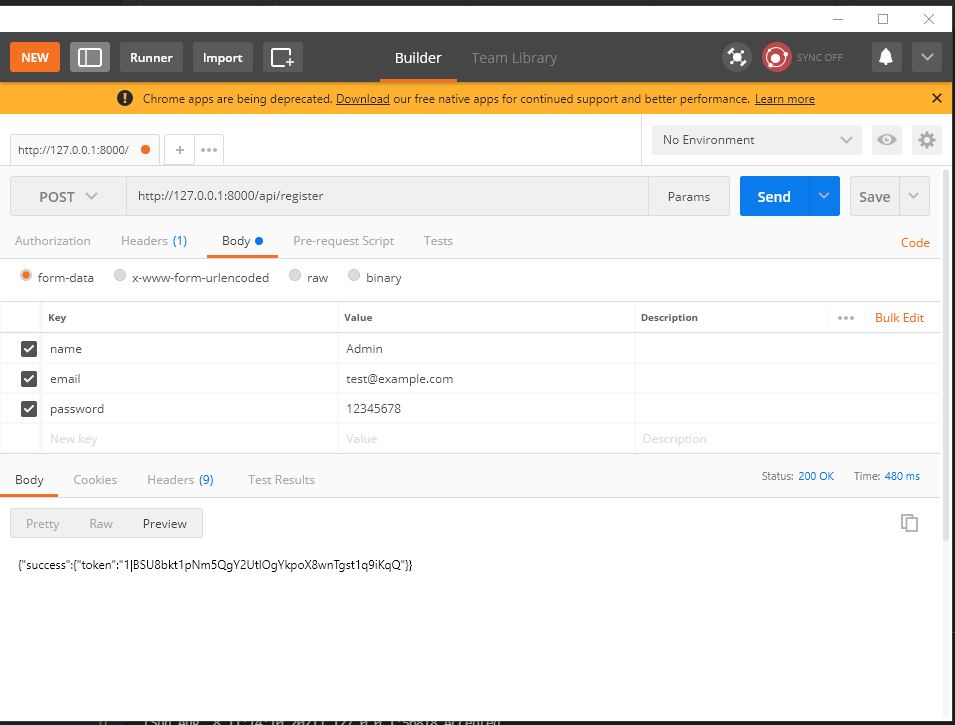
php artisan serveand open postman create a post request to http://127.0.0.1:8000/api/register in the header tab add Accept:application/json and in the body tab select form-data and add
name:Admin
email:test@example.com
password:12345678
and click send
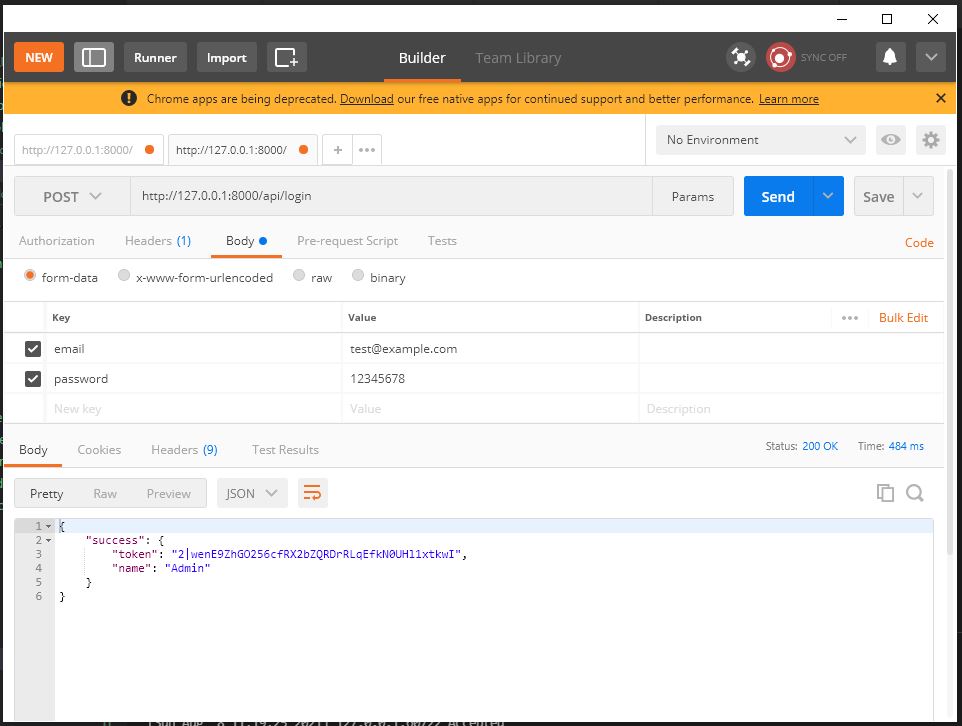
Login request
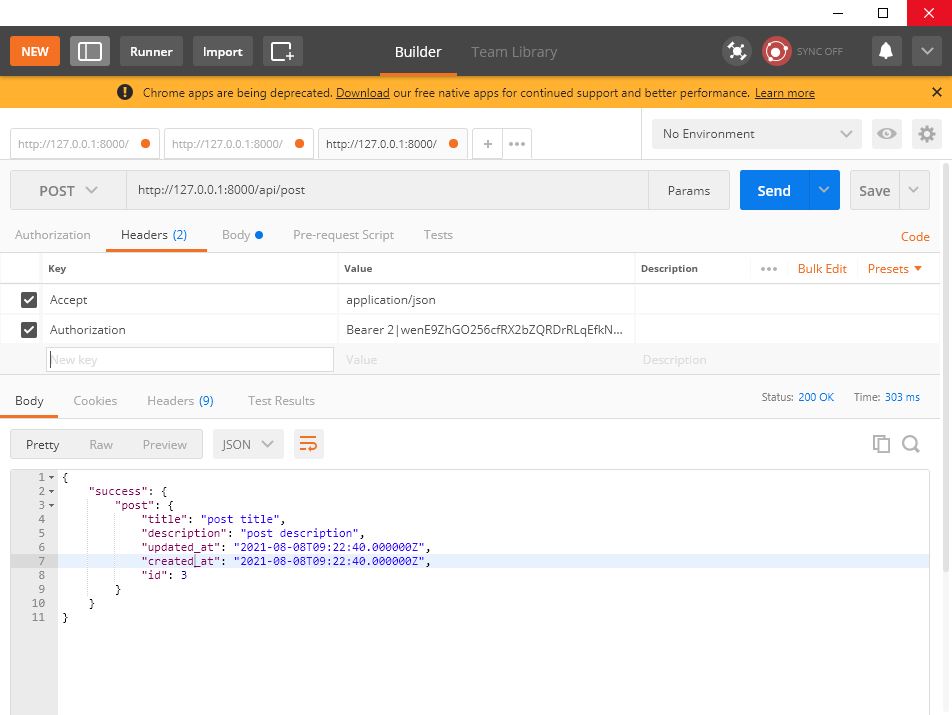
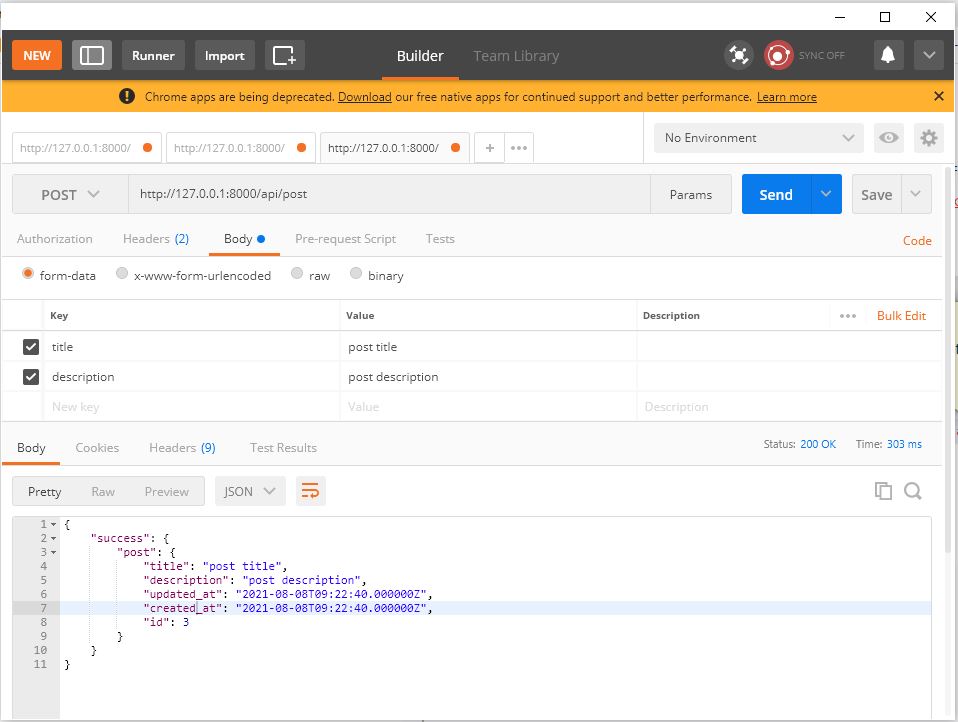
For creating post take the token and add it to the header as shown the picture
Accept:application/json
Authorization:Bearer 2|wenE9ZhGO256cfRX2bZQRDrRLqEfkN0UHl1xtkwI
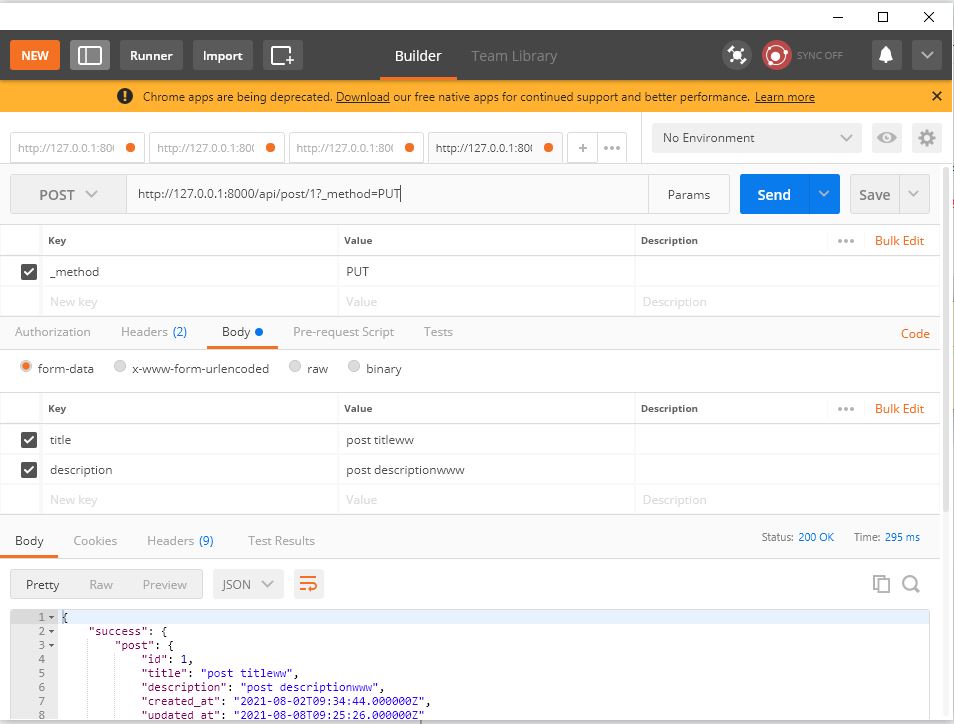
For updating the post the url will be
http://127.0.0.1:8000/api/post/1?_method=PUT
You can download the code from GitHub
https://github.com/migofk/Laravel-8-CRUD-API
I hope I could help you, thanks.
One thought on “Laravel Secure RESTful API CRUD With Access Token tutorial”
Comments are closed.