
In this tutorial, we will set up a Laravel WebSockets server and code a Vue 3 app for real-time application using Laravel 9.
What is WebSocket API or WebSockets?
WebSocket provides a Two-way communication channel between the server and the client.
You know when we use Ajax (Axios, Fetch), We can send and get data from the server without reloading the page but we must create an HTTP request every time we send or receive data. the problem here is the server can’t send us data without us requesting it first because Ajax is one-way communication.
For example in an Ajax chat app, we create a request to send a message but how can we receive a message? we need to send Ajax requests to check if there are messages for us. Actually, we need to send a request every second which is nonsense. I have done that before that was crazy the server was too slow the webpage crushed. So here comes the WebSockets, which opens a two-way interactive connection session between the server and the user’s webpage.
Unlike Ajax, the server will stay connected after responding to the request, so we can send messages and receive messages all the way via the established communication channel until the session ends. It’s like a phone call between the server and the user browser. Once, the call is initiated the server can send a message or object to the webpage at any time without polling the server for a reply.
WebSockets allow the server to send data to the webpage so that we can create real-time applications because when an event happens on the server, the server can send us messages immediately. For example, Facebook notification when someone like our post. That triggers a like event on the server then the server sends us a message notification “Someone likes your post” via a WebSocket channel.
ِAnother example In a chat app, messages go via WebSocket for all the subscribers (the users who chat with each other) in that chat connection channel.
Laravel WebSocket concept
In Laravel, we create a channel in routes\channels.php then we broadcast a Laravel event message on that channel and those who subscribed to that channel will receive the message on their browsers, that is all. Learn more about Laravel Events: Laravel Events & Listeners with Queue Tutorial
There are some Laravel packages and services for WebSockets that are used to implement real-time, live-updating user interfaces. By default, Laravel includes two server-side broadcasting drivers Pusher and Ably and they are not totally free. The community provides us with open source and free drivers laravel-websockets and soketi in addition to other technology such as socket.io of Node.js.
Installing Laravel Websockets
Laravel websockets package is an alternative to Pusher it uses its configuration and packages but it runs a WebSocket server on our hosting server instead of the Pusher server.
We can install Laravel-websockets package via composer.
composer require beyondcode/laravel-websocketsThe package comes with migration to save statistical information about the running WebSockets server.
php artisan vendor:publish --provider="BeyondCode\LaravelWebSockets\WebSocketsServiceProvider" --tag="migrations"Run the migrations
php artisan migrateAnd publish the WebSocket configuration file
php artisan vendor:publish --provider="BeyondCode\LaravelWebSockets\WebSocketsServiceProvider" --tag="config"Make sure to install Pusher as well
composer require pusher/pusher-php-server "~3.0"We need to make our BROADCAST_DRIVER to be pusher in .env file.
BROADCAST_DRIVER=pusherBelow is the pusher configuration that was modified for Laravel websockets in config/broadcasting.php. This data is for Localhost and the default port of the Laravel WebSocket server is 6001.
'pusher' => [
    'driver' => 'pusher',
    'key' => env('PUSHER_APP_KEY'),
    'secret' => env('PUSHER_APP_SECRET'),
    'app_id' => env('PUSHER_APP_ID'),
    'options' => [
        'cluster' => env('PUSHER_APP_CLUSTER'),
        'encrypted' => true,
        'host' => '127.0.0.1',
        'port' => 6001,
        'scheme' => 'http'
    ],
],
In .env file make sure to set your pusher app id, key, secret, and cluster.
PUSHER_APP_ID=local
PUSHER_APP_KEY=local
PUSHER_APP_SECRET=local
PUSHER_APP_CLUSTER=mt1
Now we are ready to test our WebSockets server.
php artisan websockets:serveLet’s run Laravel server and open the Laravel websockets dashboard http://127.0.0.1:8000/laravel-websockets
php artisan serve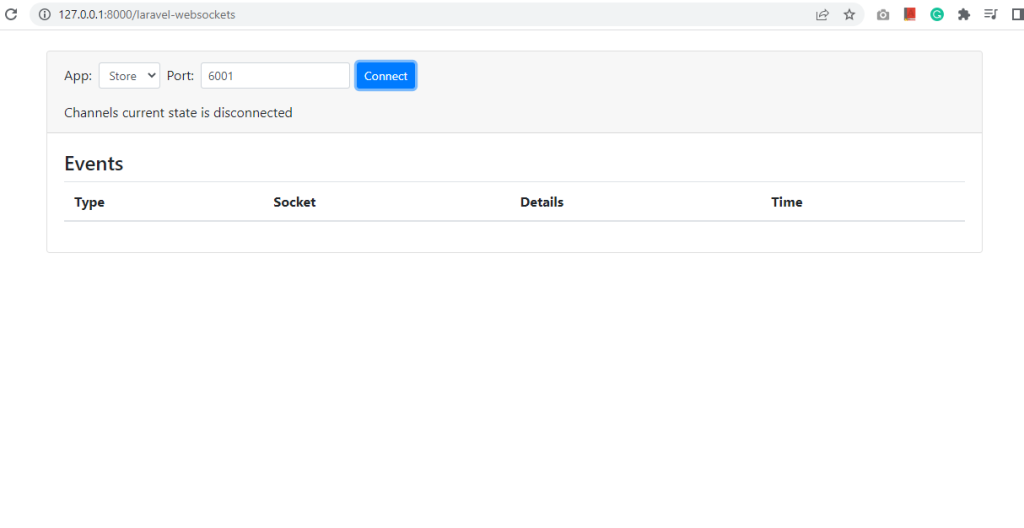
Broadcasting Laravel Event on a public channel
Let’s make our server send a message to the client in a public channel that doesn’t require authentication. First, we will create an Event.
php artisan make:event HelloIn our event app\Events\Hello.php to broadcast our event, we implement ShouldBroadcast interface. we select the channel to broadcast our event via broadcastOn function. In the broadcastWith function, we send the data or message for the client to receive.
<?php

namespace App\Events;

use Illuminate\Broadcasting\Channel;
use Illuminate\Broadcasting\InteractsWithSockets;
use Illuminate\Broadcasting\PresenceChannel;
use Illuminate\Broadcasting\PrivateChannel;
use Illuminate\Contracts\Broadcasting\ShouldBroadcast;
use Illuminate\Contracts\Broadcasting\ShouldBroadcastNow;
use Illuminate\Foundation\Events\Dispatchable;
use Illuminate\Queue\SerializesModels;

class Hello implements ShouldBroadcast
{
    use Dispatchable, InteractsWithSockets, SerializesModels;

    /**
     * Create a new event instance.
     *
     * @return void
     */
    public function __construct()
    {
        //
    }


    public function broadcastWith()
    {
         //echo"broadcastWith";
        return  ['welcome'=>'welcome to the club'];
    }

    /**
     * Get the channels the event should broadcast on.
     *
     * @return \Illuminate\Broadcasting\Channel|array
     */
    public function broadcastOn()
    {
        return new Channel('public');
    }


}
By default, the event will be stored in a queue job but if you want to broadcast immediately use ShouldBroadcastNow interface.
Let’s create a route in the routes\web.php file so we can test our event.
use App\Events\Hello;

Route::get('/broadcast',function(){

    broadcast(new Hello());
    return "Event has been sent!";
});
First, open the Laravel websockets dashboard http://127.0.0.1:8000/laravel-websockets and click connect button and make sure you use the port 6001 then in another browser tab go to http://127.0.0.1:8000/broadcast you should see “Event has been sent!”. Now go back to websockets dashboard tab
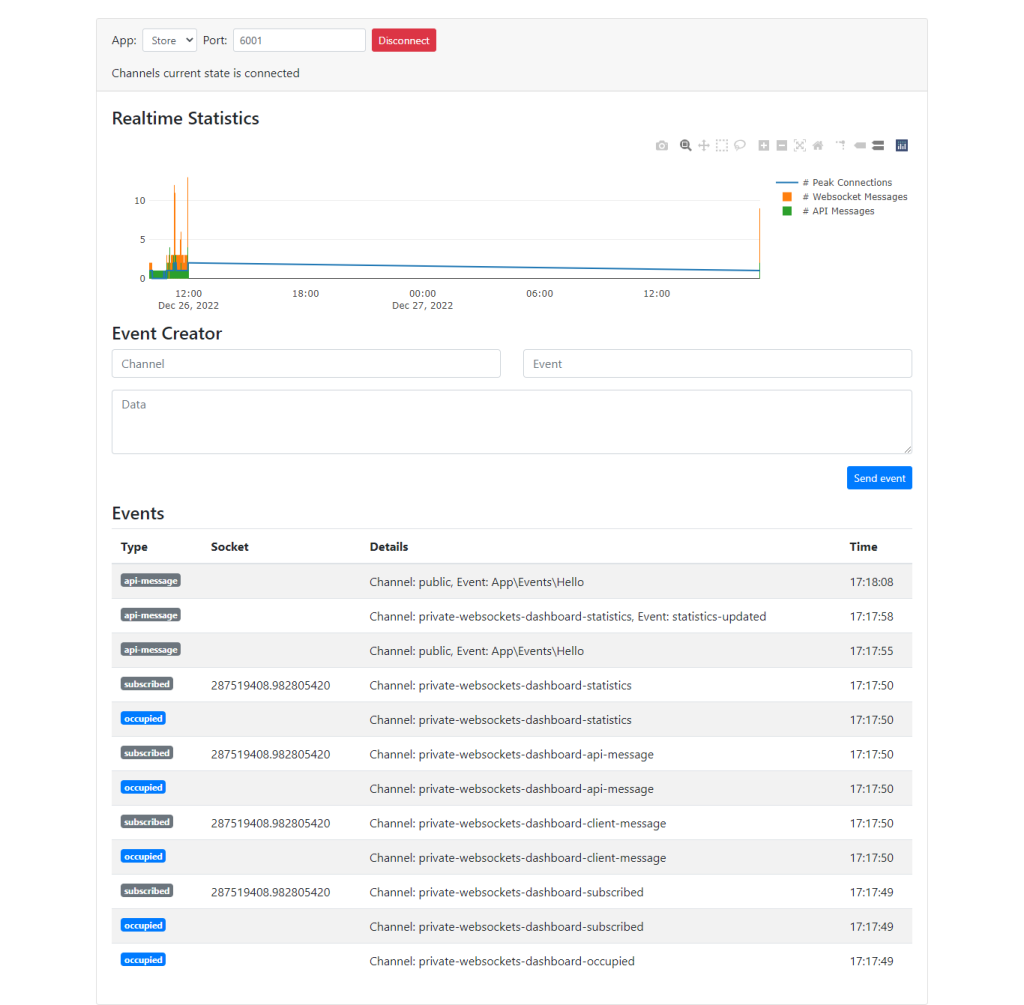
As you can see, the first row api-message has the channel name and the event name as well.
Notice you don’t have to declare a public channel in routes\channels.php but if you want, let’s do it
//

Broadcast::channel('public', function ($user) {
    return true;
});

//
Broadcasting Laravel Event on a private channel
Let’s create an event that will return the user’s first name on a private channel that needs authentication.
Here is our event,
<?php

namespace App\Events;

use Illuminate\Broadcasting\Channel;
use Illuminate\Broadcasting\InteractsWithSockets;
use Illuminate\Broadcasting\PresenceChannel;
use Illuminate\Broadcasting\PrivateChannel;
use Illuminate\Contracts\Broadcasting\ShouldBroadcast;
use Illuminate\Foundation\Events\Dispatchable;
use Illuminate\Queue\SerializesModels;

class PrivateTest implements ShouldBroadcast
{
    use Dispatchable, InteractsWithSockets, SerializesModels;

    /**
     * Create a new event instance.
     *
     * @return void
     */
    public $user;
    public function __construct($user)
    {
        $this->user = $user;
    }

    /**
     * Get the channels the event should broadcast on.
     *
     * @return \Illuminate\Broadcasting\Channel|array
     */

    public function broadcastWith(){
        return ['name'=> $this->user->first_name];
    }
    public function broadcastOn()
    {
        return new PrivateChannel('test-channel.'.$this->user->id);
    }
}
This event will take the user model as a parameter and the only difference here in the broadcastOn() we return PrivateChannel with a channel name containing the user Id so that only that user who can subscribe to this channel like that test-channel.5.
Let’s declare our channel. routes\channels.php
//
Broadcast::channel('test-channel.{id}', function ($user, $id) {
    return (int) $user->id === (int) $id;
});

//
Let’s create a route in the routes\web.php file so we can test our event.
Route::get('/broadcastPrivate',function(){
    $user = App\Models\User::find(5);
    broadcast(new PrivateTest($user));
    return "Event has been sent!";
});
Now the user with id 5 can receive the message and you can go to /broadcastPrivate URL and check the websocket dashboard.
Authorizing Private Broadcast Channels With Sanctum RESTful API
Add the following route in routes\api.php
Broadcast::routes(['middleware' => ['auth:sanctum']]);Uncomment App\Providers\BroadcastServiceProvider::class, in config\app.php at providers
Laravel Echo With Vue 3
Laravel Echo has everything you need for a separate Vue 3 front-end application. Let’s install the package with pusher js.
npm i laravel-echo
npm i pusher-js
vue applications by default support .env file. so let’s create one in the project root folder.
VUE_APP_WEBSOCKETS_KEY=local
VUE_APP_WEBSOCKETS_SERVER=127.0.0.1

baseURL= http://127.0.0.1:8000
In the main js file let’s set up a connection by Laravel echo pusher js. src\main.js
import { createApp } from 'vue'
import App from './App.vue'

import Echo from "laravel-echo"
window.Pusher = require('pusher-js');

window.Echo = new Echo({
    broadcaster: 'pusher',
    key: process.env.VUE_APP_WEBSOCKETS_KEY,
    wsHost:process.env.VUE_APP_WEBSOCKETS_SERVER,
    wsPort: 6001,
    cluster: "mt1",
    forceTLS: false,
    disableStats: true,
    authEndpoint :'http://127.0.0.1:8000/api/broadcasting/auth',
    auth:{
        headers: {
            Authorization: 'Bearer '+YOUR_TOKEN_FROM_LOGIN,
        }
    },

});
createApp(App).mount('#app')
In the src\App.vue file let’s connect the public or the private channel.
<template>
  <img alt="Vue logo" src="./assets/logo.png">
  <HelloWorld msg="Welcome to Your Vue.js App"/>
</template>

<script>

import HelloWorld from './components/HelloWorld.vue'

export default {
  name: 'App',
  components: {
    HelloWorld
  },
  mounted(){

    console.log('e');
   // to connect the public channel
    window.Echo.channel('public').listen('Hello',(e)=>{
       console.log('go public');
       //code for displaying the serve data
       console.log(e); // the data from the server
    })

   // to connect the privatechannel
    window.Echo.private('test-channel.5').listen('PrivateTest',(e)=>{
       console.log('go private');
       //code for displaying the serve data
       console.log(e); // the data from the server
    })
  }
}
</script>

<style>
#app {
  font-family: Avenir, Helvetica, Arial, sans-serif;
  -webkit-font-smoothing: antialiased;
  -moz-osx-font-smoothing: grayscale;
  text-align: center;
  color: #2c3e50;
  margin-top: 60px;
}
</style>
Now we open any event firing route that we have created you should see the data in the console.
Note. I had a problem with the pusher server and I had to downgrade to version 7 "pusher/pusher-php-server": "7",
That’s all for now, I hope that was a useful tutorial for you.