

In this tutorial, we will make an intelligent security webcam using a pre-trained object detection model in javascript that can detect objects and play alarm until the thing goes away. It can detect a person, dog, cat, etc.
TensorFlow.js is a JavaScript library that allows you to build and run machine learning models in the browser. Vue is a JavaScript framework that makes it easy to build user interfaces for our new security camera and allows us to view live video. By combining these two technologies, We can create a security camera that can detect objects, people, or animals without having to set up a server or database, everything will run from the user’s browser. We will use a pre-trained object detection model, so we don’t have to train our own model. Here is a live example
Video tutorial: Here is My YouTube video about this Tutorial
Learn more about using AI models: How To Detect Toxic & Inappropriate Comments Using AI And Node.js.
The steps to create the security camera
- Create a new Vue application
- Create a Vue component that displays live video from a webcam.
- Choose a pre-trained object detection model.
- Load the model into TensorFlow.js.
- Add code to the Vue application to detect objects in the live video.
- Play alert sound when objects or people are detected.
- Stop the alarm when the thing goes away.
Setup Vue application
First, Let’s set up Vue.js 3 application with Vite.
npm create vite@latest security-camera -- --template vueSecond, Let’s add the below dependencies to the package.json file in the root project folder so we can install them with the npm install command.
"dependencies": {
    "@tensorflow-models/coco-ssd": "^2.2.2",
    "@tensorflow/tfjs": "^4.8.0",
    "@tensorflow/tfjs-backend-cpu": "^3.11.0",
    "@tensorflow/tfjs-backend-webgl": "^3.11.0",
    "vue": "^3.3.4"
},@tensorflow-models/coco-ssd: This is a pre-trained object detection TensorFlow.js model COCO-SSD that can identify multiple objects in a single image. The model is capable of detecting 80 classes of objects, you can check the listhere@tensorflow/tfjs": This is the Tensorflow.js package.@tensorflow/tfjs-backend-cpu: This package implements a JavaScript-based CPU backend to TensorFlow.js@tensorflow/tfjs-backend-webgl: This package implements a GPU-accelerated WebGL backend for TensorFlow.js
Let’s go to the project folder and install the packages and test our app.
cd security-camera
  npm install
  npm run dev
TensorFlow Object Detection (COCO-SSD)
In the third step of creating the app “Choose a pre-trained object detection model”. Object detection is a computer vision task that aims to locate and identify objects in an image or video. It is a challenging task. COCO-SSD is a popular object detection model, The model is able to detect objects in real-time, and it has been used in a variety of applications, such as self-driving cars, robotics, and video surveillance. It is trained on the COCO dataset, which is a large-scale object detection dataset that contains over 200,000 images and 80 object categories.
Vue Component For AI Security Camera
Let’s code our application and use AI to detect if a person is in the camera view.
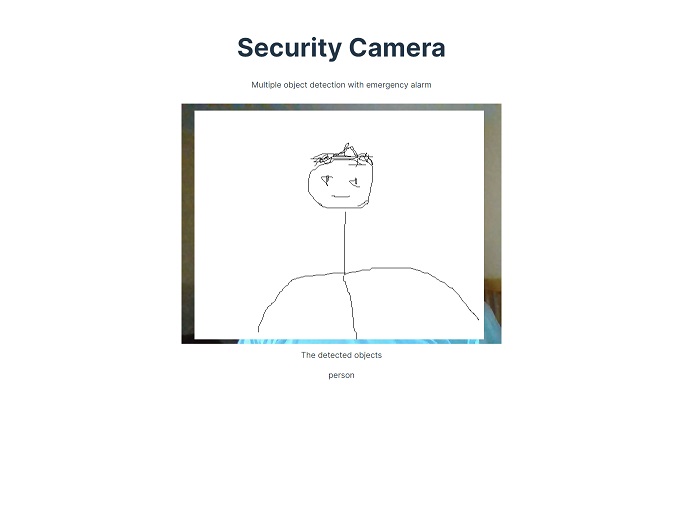
Here is the template part, I’m using Bootstrap here but it’s okay to not use it. All we need is the title, the short description and the cam view section to display the live streaming of the webcam and a place to display the object detected class name, exactly like the above image.
<template>
    <div class="container min-h-content py-5 text-center">
        <div class="row py-lg-5">
            <div class="col-lg-6 col-md-8 mx-auto">
                <h1 >Security Camera</h1>
                 <p class=" h4">Multiple object detection with emergency alarm</p>
                     <div v-if="!showBtn" class="my-5" >
                     <div  class="spinner-border spinner-border-sm" role="status"></div>
                      <span class=""> Loading...</span>
                     </div>
                <section ref="demosSection" v-if="showBtn">

                <p> </p>
                <div ref="liveView" class="camView">
                    <button v-if="!camStarted" class="btn btn-secondary" @click="enableCam">Enable Webcam</button>
                    <video  ref="video"  autoplay muted style="height: 460; width: 100%;"></video>
                </div>
                <p >The detected objects</p>
                <p ref="onTheScreen" style="height: 250px;"></p>
                <audio ref="audio" >
                  <source  :src="alarm" type="audio/mp3">
                  Your browser does not support the audio element.
                </audio>
                </section>

            </div>
        </div>
    </div>
</template>
The template includes a header, a live view of the webcam, a section for displaying the detected objects, and an audio alarm.
Below is the style we need for the video the cam view.
<style scoped>
body {
    font-family: helvetica, arial, sans-serif;
    margin: 2em;
    color: #3D3D3D;
  }

  video {
    display: block;
  }

  section {
    opacity: 1;
    transition: opacity 500ms ease-in-out;
  }

  .camView {
    position: relative;
    float: left;
    width: calc(100% - 20px);
    margin: 10px;
    cursor: pointer;
  }

  .camView p {
    position: absolute;
    padding: 5px;
    background-color: rgba(255, 111, 0, 0.85);
    color: #FFF;
    border: 1px dashed rgba(255, 255, 255, 0.7);
    z-index: 2;
    font-size: 12px;
  }

</style>
The JavaScript part
<script setup>
import {ref} from 'vue'
import '@tensorflow/tfjs-backend-cpu'
import '@tensorflow/tfjs-backend-webgl'
import * as cocoSsd from '@tensorflow-models/coco-ssd'
import  alarm from  './assets/alarm.mp3'

const video = ref(null)
const liveView = ref(null)
const demosSection = ref(null)
const onTheScreen = ref(null)
const audio = ref(null)
const showBtn = ref(false)
const camStarted = ref(false)


let model = undefined;

//loading the model
cocoSsd.load().then(function (loadedModel) {
  model = loadedModel;
  showBtn.value = true
});

async function  enableCam(event) {
    if (!model) {
        return;
      }
      camStarted.value =true;
      const constraints = {
        video: true
      };

      // Activate the webcam stream.
     await navigator.mediaDevices.getUserMedia(constraints).then(function(stream) {
      try {
             video.value.srcObject  = stream
              console.log('try',stream)
            } catch (error) {
              console.log('catch',error)
            }

        video.value.addEventListener('loadeddata', predictWebcam);
      });
  }


  const children2 = ref([]);
  function predictWebcam() {

  //classifying a frame in the stream.
  model.detect(video.value).then(function (predictions) {

    for (let i = 0; i < children2.value.length; i++) {
        onTheScreen.value.removeChild(children2.value[i]);

      }

    children2.value.splice(0);

    // loop through predictions
    for (let n = 0; n < predictions.length; n++) {

      if (predictions[n].score > 0.66) {
        const div = document.createElement('div');
        div.innerHTML = predictions[n].class
        //check if prediction class is person to play alarm
        if (predictions[n].class == "person"){
           audio.value.play()
        }
        onTheScreen.value.appendChild(div);
        children2.value.push(div);

      }
    }

    // Call this function again to keep predicting when the browser is ready.
    window.requestAnimationFrame(predictWebcam);
  });
}
</script>
The cocoSsd.load() function loads the COCO-SSD model and we made let model = undefined to know if the model loaded or not so we can change the value showBtn to let the user see the Enable Webcam button.
The enableCam() function enables the webcam after the model is loaded and starts the prediction loop of the tf.js model.
The predictWebcam() function classifies a frame in the webcam stream and plays the alarm sound if a person is detected.
The children2 variable is a reactive variable that is used to store the list of DOM elements that are displayed on the screen.
The for loops are used to loop through the predictions and create DOM elements for each prediction. The if statements are used to check the score of each prediction and determine whether to play the alarm sound.
The window.requestAnimationFrame() function is used to call the predictWebcam() function repeatedly, so that the predictions are updated in real time.
Conclusion
We could make a smart webcam that can detect things and take actions depending on what the camera sees. We used a pre-trained machine-learning model that is open-source and free which saves us money and time. finally, I hope that was useful for you thank you.